Table of Contents
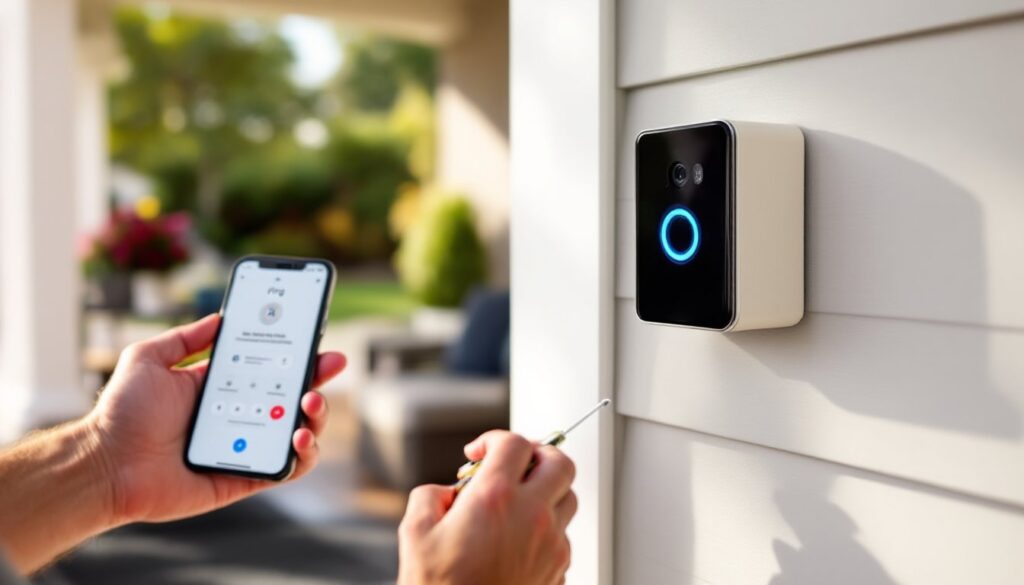
ToggleInstalling a Ring doorbell isn’t much harder than hanging a picture frame, if you’ve got the right prep. Whether someone’s replacing an old wired doorbell or mounting a battery model on a post, the process takes about 30 minutes for most homeowners. The trickiest part usually isn’t the physical install: it’s making sure the Wi-Fi signal reaches the front door and getting the app settings dialed in. This guide walks through both wired and battery installations, covers the electrical work (which is minimal), and explains how to connect everything through the Ring app so the doorbell actually notifies someone when a visitor rings.
Key Takeaways
- Setting up a Ring doorbell takes about 30 minutes and involves either connecting to existing wiring or mounting a battery-powered model, with Wi-Fi connectivity and app configuration being the most critical steps.
- Before installing a Ring doorbell, verify your transformer voltage (16-24V AC minimum), ensure a strong Wi-Fi signal at the front door, and gather essential tools like a voltage tester, drill, and screwdriver to avoid mid-project hardware store trips.
- Wired Ring doorbells tap into existing doorbell circuits and eliminate battery swaps, while battery models offer flexibility for homes without wiring and typically provide 6-12 months of battery life with moderate motion activity.
- Ring doorbells only connect to 2.4 GHz Wi-Fi networks, not 5 GHz, so select the correct network during app setup and use the Ring app’s motion zones and sensitivity settings to reduce false alerts from sidewalks or passing vehicles.
- After installation, test the doorbell by pressing the button, triggering motion detection, and checking the live video feed in the app; adjust the mounting angle and motion sensor positioning if the unit fails to detect visitors consistently.
What You’ll Need Before Installing Your Ring Doorbell
Having everything on hand before starting saves trips to the hardware store mid-project.
For wired Ring doorbells:
- Screwdriver set (Phillips and flathead)
- Wire stripper/cutter
- Voltage tester (non-contact type works fine)
- Drill with bits (masonry bit for brick/stucco, standard bits for wood/vinyl)
- Level (a 6-inch torpedo level is plenty)
- Pencil
- Safety glasses
For battery-powered models:
- Screwdriver (usually just Phillips)
- Drill with bits
- Level
- Pencil
- Fully charged Ring battery (charge it overnight before install day)
Everyone needs:
- Stable Wi-Fi network with password handy
- Smartphone with the Ring app downloaded (iOS or Android)
- Ring account (free to create)
Check the existing doorbell transformer if installing a wired model. Ring doorbells need 16-24V AC and at least 10VA of power. The transformer is usually in the basement, garage, or utility closet near the electrical panel. It’s a small metal box about the size of a deck of cards. If the existing doorbell works, the transformer is likely fine, but verify the voltage with a multimeter to avoid issues later.
For battery models, confirm the mounting location gets a decent Wi-Fi signal. Walk to the door with a phone, check the signal strength, and consider a Wi-Fi extender if bars are low. Ring doorbells need a solid connection to send alerts and stream video.
Step-by-Step: Installing a Wired Ring Doorbell
Wired installations tap into existing doorbell wiring, which powers the unit and eliminates battery swaps. Most homes built after 1960 have doorbell wiring at the front entry.
Turning Off Power and Removing Your Old Doorbell
Safety first: Locate the breaker controlling the doorbell circuit and flip it off. Doorbell voltage is low (typically 16-24V), but it’s good practice. Use a non-contact voltage tester on the wires after removing the old doorbell to confirm power is off.
- Remove the old doorbell. Most units are held by two screws. Unscrew and gently pull the doorbell away from the wall.
- Disconnect the wires. There are usually two wires (often one white, one colored) attached to screw terminals. Loosen the terminals and remove the wires. Don’t let them slip back into the wall, wrap them around a pencil or tape them to the siding temporarily.
- Inspect the wires. If the ends are corroded or frayed, snip off about 1/4 inch with wire cutters and strip 1/4 inch of fresh insulation with a wire stripper.
- Remove the old mounting bracket if there is one. Patch any large holes with exterior-grade wood filler or caulk if needed, but small screw holes are fine to leave.
Mounting and Wiring Your Ring Doorbell
- Attach the mounting bracket. Ring includes a mounting plate in the box. Hold it level against the wall where the doorbell will sit (usually around 48 inches from the ground, per typical smart home installation practices). Mark the screw holes with a pencil.
- Drill pilot holes. For wood or vinyl siding, use a standard 1/8-inch bit. For brick, stucco, or masonry, use a masonry bit and the included plastic anchors. Drill slowly to avoid cracking.
- Secure the bracket. Drive the screws through the bracket into the pilot holes. Check level again before fully tightening.
- Connect the wires to the Ring doorbell. Thread the two doorbell wires through the center opening of the mounting bracket. Loosen the two terminal screws on the back of the Ring doorbell, loop each wire around a terminal (polarity doesn’t matter for most models), and tighten the screws. Give each wire a gentle tug to confirm it’s secure.
- Snap the Ring doorbell onto the bracket. Align the doorbell with the mounting plate and press until it clicks. Some models use a small security screw at the bottom, insert and tighten it with the included screwdriver bit.
- Restore power. Flip the breaker back on. The Ring doorbell should light up or chime to indicate it’s receiving power.
If the doorbell doesn’t power on, double-check the transformer voltage and verify the wires are making solid contact with the terminals. A loose connection is the most common culprit.
Step-by-Step: Installing a Battery-Powered Ring Doorbell
Battery models work anywhere, no existing wiring required. They’re ideal for homes without doorbell wiring, rental properties, or spots like side doors and garages.
- Charge the battery. Slide the battery pack out of the Ring doorbell (there’s usually a release tab at the bottom) and plug it into a standard USB charger using the included cable. A full charge takes 5-10 hours. The LED on the battery turns green when ready.
- Choose the mounting location. Battery doorbells rely on motion detection and Wi-Fi, so placement matters. Mount it at 48 inches from the ground for best motion coverage. Avoid spots with direct sun all day (heat shortens battery life) or areas more than 30 feet from the Wi-Fi router.
- Attach the mounting bracket. Hold the bracket level, mark the screw holes, and drill pilot holes (1/8-inch bit for wood/vinyl, masonry bit and anchors for brick/stucco). Secure the bracket with the included screws.
- Insert the battery. Slide the charged battery into the Ring doorbell until it clicks.
- Attach the doorbell to the bracket. Align the doorbell with the mounting plate and press until it snaps into place. Tighten the security screw at the bottom if the model includes one.
Battery life depends on usage, but most homeowners get 6-12 months per charge with moderate activity (10-20 motion events per day). Cold weather drains batteries faster, expect shorter intervals in winter. Keep a second battery charged as a hot-swap backup to avoid downtime.
Connecting Your Ring Doorbell to Wi-Fi and the Ring App
The Ring app handles setup, and it’s surprisingly straightforward. Both iOS and Android versions work the same way.
- Download the Ring app from the App Store or Google Play if it’s not already installed.
- Create or log into a Ring account. Use an email and password. Ring will send a verification code to the email.
- Tap “Set Up a Device” on the home screen, then select “Doorbells.”
- Scan the QR code on the back of the Ring doorbell or on the Quick Start guide. The app will identify the model.
- Name the doorbell. Choose something simple like “Front Door” or “Porch.”
- Put the doorbell in setup mode. Press and hold the orange button on the back (or inside the faceplate, depending on the model) until the light on the front starts spinning. This usually takes 15-20 seconds.
- Connect to the Ring’s temporary Wi-Fi network. The app will prompt a switch to the doorbell’s setup network (it’ll be named something like “Ring-XXXX”). This is temporary.
- Select the home Wi-Fi network and enter the password. The Ring doorbell will connect, and the app will confirm when it’s online. This step can take 1-2 minutes.
- Test the connection. The app will run a quick check to confirm signal strength. If it’s weak, consider moving the router closer or adding a Wi-Fi extender.
Ring doorbells work on 2.4 GHz Wi-Fi only, they won’t connect to 5 GHz networks. If the router broadcasts both, make sure to select the 2.4 GHz network name during setup. Many modern devices have similar requirements, which home automation systems often address with dual-band routers.
Customizing Settings and Testing Your New Doorbell
Out of the box, Ring doorbells use default settings that work fine but aren’t optimized for every situation. A few tweaks improve performance and cut down on false alerts.
Motion Zones: The app lets someone draw custom zones on the camera’s field of view. This tells the doorbell which areas to monitor and which to ignore. For example, if a busy sidewalk sits at the edge of the frame, exclude it to avoid alerts every time a pedestrian walks by. Tap “Motion Settings” > “Motion Zones” and draw the zones with a finger.
Motion Sensitivity: Adjust the slider in “Motion Settings.” Higher sensitivity catches more movement but increases false alerts from cars, animals, or swaying branches. Start at medium and adjust over a few days based on activity.
Alert Preferences: Choose whether to receive notifications for motion, doorbell rings, or both. Some people turn off motion alerts at night or during work hours using “Motion Schedules” in the app.
Chime Settings: If the home has an existing mechanical doorbell chime, it should ring when someone presses the Ring button (assuming it’s a wired install). If not, check “Device Settings” > “General Settings” > “Doorbell Chime Type” and toggle between mechanical, digital, or none. For battery models or homes without a chime, Ring sells a plug-in chime that connects via Wi-Fi.
Video Quality: Ring doorbells record in 1080p by default, but the app allows adjustment to save bandwidth. Lower resolution uses less data, which helps if someone has a slow internet connection or a data cap.
Test everything: Press the doorbell button and confirm the chime rings (if applicable) and a notification appears on the phone. Walk in front of the doorbell to trigger motion detection. Check the live view in the app to confirm video quality and framing. Adjust the angle if needed using the included wedge kit (small plastic shims that tilt the doorbell up, down, or sideways).
Ring doorbells comply with UL standards for low-voltage devices, but note that local ordinances may restrict recording audio or video in certain areas (e.g., shared hallways in condos or areas where neighbors have a reasonable expectation of privacy). Check local regulations if installing in a multi-unit building.
If the doorbell doesn’t trigger consistently, adjust motion sensitivity or reposition the unit. Trees, shrubs, or columns can block the motion sensor’s field of view. The sensor works best with a clear line of sight to the approach path (walkway, steps, driveway).