Table of Contents
ToggleNobody wants to share their home with mice, but spotting droppings in the pantry or hearing scratching in the walls means it’s time to take action. Setting up a mouse trap isn’t complicated, but doing it right makes the difference between catching the culprit in hours versus watching bait disappear for weeks. The key isn’t just the trap itself, it’s choosing the right type, placing it where mice actually travel, and baiting it with something they can’t resist. This guide walks through everything needed to set up traps that work, from traditional snap traps to modern alternatives, plus the mistakes that let mice win.
Key Takeaways
- Snap traps remain the most cost-effective and reliable choice for setting up mouse traps, though plastic versions are easier to set than traditional wooden models.
- Proper placement is critical: position traps perpendicular to walls where mice travel, focusing on high-traffic zones like behind appliances, pantries, and basement corners.
- Peanut butter is the most effective bait for mouse traps because its sticky texture forces mice to trigger the mechanism rather than stealing it quickly.
- Use at least 6 traps in an average home and space them 2-10 feet apart in active areas, as a single trap is unlikely to control even a small infestation.
- After catching a mouse, continue monitoring with traps for 14 days without activity before concluding the problem is solved, and seal all entry points ¼ inch or larger to prevent re-entry.
- Wear disposable gloves when handling traps and dead mice, as rodents carry pathogens like hantavirus and salmonella transmitted through droppings and urine.
Choosing the Right Mouse Trap for Your Home
The trap aisle offers dozens of options, but most fall into three categories: snap traps, live traps, and electronic traps. Each works differently and fits specific situations.
Snap Traps vs. Live Traps vs. Electronic Options
Snap traps remain the most common choice for good reason, they’re cheap (typically $1-3 each), reusable, and effective when set properly. The classic wooden Victor trap still works, but plastic versions from brands like Tomcat offer easier setting mechanisms and smoother cleanup. The bar-style kill is instant when the trap fires correctly. Downside: they require handling the dead mouse and can snap fingers during setup if you’re not careful.
Live traps (also called catch-and-release or humane traps) use a one-way door or tipping mechanism to cage mice without killing them. They run $8-20 and work well for people squeamish about lethal methods or dealing with protected species in some jurisdictions. The catch: someone has to release the mouse at least a mile from the home, or it’ll return. Mice can also die of stress in the trap if not checked within 4-6 hours. Not ideal for heavy infestations.
Electronic traps deliver a high-voltage shock that kills instantly when the mouse enters a chamber. Models from Victor and Rat Zapper cost $25-50, run on batteries, and feature indicator lights when a mouse is caught. They’re cleaner, no visible body, and disposal involves dumping into a bag without touching anything. The trade-off is cost and the need for fresh batteries. They excel in garages, basements, or anywhere checking traps daily isn’t convenient.
For most homeowners facing 1-3 mice, a half-dozen plastic snap traps offers the best balance of cost and results. For ongoing problems or sensitive areas like kitchens, electronic traps justify the investment.
Where to Place Mouse Traps for Maximum Success
Mice don’t wander randomly, they follow established routes along walls, behind appliances, and near food sources. Trap placement matters more than bait type.
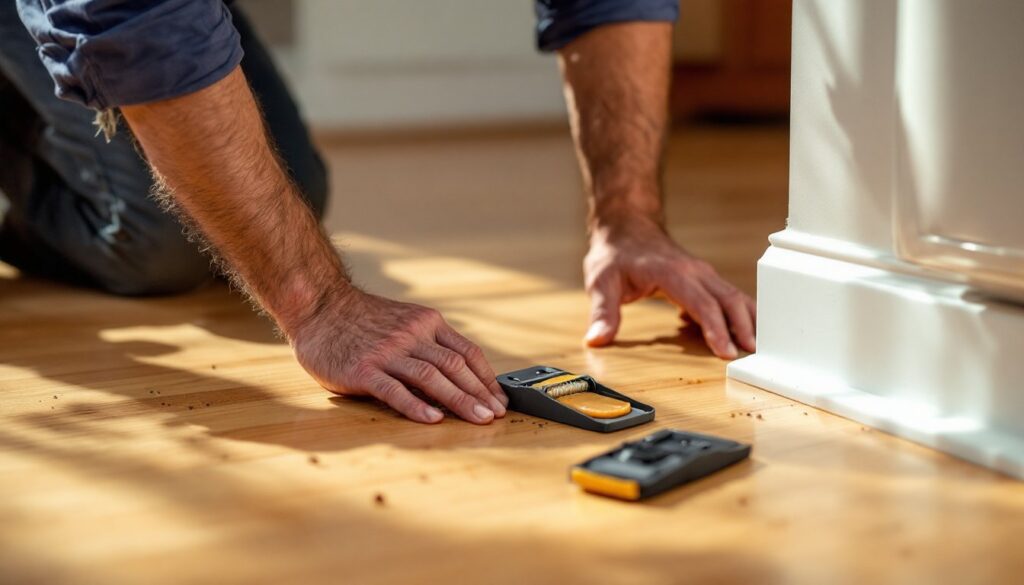
Set traps perpendicular to walls with the trigger end facing the baseboard. Mice travel with their sides brushing walls for navigation, so they’ll run directly into the trigger. Placing a trap in the middle of a room wastes time.
Focus on these high-traffic zones:
- Kitchen: Behind the stove, refrigerator, and dishwasher. Check the gap where cabinets meet the floor.
- Pantry: In corners and along shelves where boxes or bags show gnaw marks.
- Basement/Crawlspace: Near foundation cracks, utility penetrations, or stored cardboard.
- Garage: Along the wall where the door meets the floor, near stored pet food or birdseed.
- Attic: Near vents, pipe chases, or insulation disturbances.
Look for droppings (small, dark pellets about the size of a rice grain), gnaw marks on cardboard or wood, and grease smudges along baseboards from their oily fur. These signs pinpoint active runways.
Space traps 2-10 feet apart in areas with evidence. Mice have territories of about 10-30 feet, so saturation matters in active zones. Don’t just set one trap and hope, effective control according to DIY pest management guides typically requires 6-12 traps for an average home.
Avoid placing traps where kids or pets can reach them. If necessary, use a cardboard box with mouse-sized entry holes cut in the sides to create a protective barrier around the trap.
Step-by-Step: Setting Up a Traditional Snap Trap
Snap traps intimidate first-timers, but the process takes 30 seconds once you understand the mechanics. Modern plastic traps are easier than the old wooden ones that required precise balance.
For plastic snap traps (Tomcat, Victor Easy Set):
- Apply bait to the bait cup or pedal while the trap is unset. Use a pea-sized amount, too much lets mice steal it without triggering.
- Pull back the kill bar until it extends past the back of the trap.
- Engage the locking mechanism, usually a tab or clip that holds tension. You’ll hear or feel it click.
- Place carefully against the wall. The trap is now live: any touch to the trigger will fire it.
For traditional wooden snap traps:
- Bait the metal bait pedal in the center.
- Pull the wire kill bar back over the trap body.
- Hold the bar down with one hand while using the other to pull the locking arm back.
- Hook the locking arm under the bait pedal. This requires a delicate touch, too much pressure fires the trap, too little and it won’t hold.
- Set down gently. The slightest vibration can trigger these.
Safety tip: Keep fingers on the sides of the trap, never over the kill bar path. Wear work gloves if you’re nervous, a snap won’t break skin through gloves, though it’ll still sting.
For electronic traps, the setup is simpler: insert batteries, add bait to the chamber, and switch on. Many contemporary workshop and home projects favor these battery-powered models for consistent results without the manual reset.
Baiting Your Trap: What Actually Works Best
Forget the cartoons, mice don’t prefer cheese. They’re attracted to high-calorie foods with strong scents, especially those matching what they’ve been eating in the home.
Top baits that consistently work:
- Peanut butter: The gold standard. Sticky texture means mice can’t grab-and-run: they have to work at it, triggering the trap. Use creamy, not chunky.
- Chocolate hazelnut spread (Nutella): High sugar and fat content. Works especially well in kitchens where mice have access to sweets.
- Bacon or bacon grease: Strong smell attracts from a distance. Works great in garages and basements.
- Sunflower seeds or peanuts: Matches natural food preferences. Best for catch-and-release traps.
- Dried fruit (raisins, cranberries): Sweet and chewy. Glue it to the trigger with a dab of peanut butter.
What doesn’t work well:
- Hard cheese: Mice can nibble it off without enough pressure to trigger.
- Bread or crackers: Too light: often stolen without setting off the trap.
- Bait blocks or pellets: Designed for bait stations, not traps.
Apply just a pea-sized amount to the trigger or bait cup. More isn’t better, it lets mice feed from the sides. For wooden traps, smear peanut butter directly onto the metal pedal. For plastic traps with bait cups, fill the cup about halfway.
Refresh bait every 3-4 days if it hasn’t caught anything. Old bait loses scent and dries out, becoming less attractive. Detailed bait placement techniques can improve success rates, especially when dealing with trap-shy mice that have learned to avoid certain setups.
Safety Tips and Common Mistakes to Avoid
Traps are simple tools, but common errors reduce effectiveness or create safety hazards.
Safety precautions:
- Wear disposable gloves when handling traps and dead mice. Rodents can carry hantavirus, salmonella, and other pathogens transmitted through droppings and urine.
- Never place snap traps where children or pets can access them. A snap trap has enough force to hurt a toddler’s fingers or a dog’s nose.
- Use a flashlight when checking traps in dark spaces like crawlspaces or attics, unexpected encounters with live mice cause more injuries than the traps themselves.
- Wash hands thoroughly after handling traps, even with gloves.
Common mistakes that sabotage results:
- Not using enough traps: One or two traps won’t cut it. Mice reproduce rapidly, a single female can have 5-10 litters per year.
- Setting traps in the open: Mice avoid open spaces. If the trap isn’t tight against a wall or in a corner, it’s in the wrong spot.
- Using too much bait: Mice can eat from the sides without triggering. Less is more.
- Giving up too soon: Mice are neophobic (afraid of new objects). They may avoid fresh traps for 2-3 days before investigating. Leave traps in place for at least a week.
- Ignoring entry points: Trapping alone won’t solve the problem if mice keep entering. Seal cracks and gaps larger than ¼ inch with steel wool and caulk, especially around pipes and foundation.
- Setting traps with human scent: Mice have keen noses. Wearing gloves during setup minimizes human scent that might make them cautious.
If traps keep going off without catching anything, the trigger sensitivity might be too high (for old wooden traps) or mice are learning to approach from the back. Reposition the trap or switch to a different style.
What to Do After You Catch a Mouse
Success means dealing with disposal and deciding whether more traps are needed.
Disposing of a dead mouse:
- Put on disposable gloves before touching the trap.
- For snap traps: Place the entire trap with the mouse in a plastic bag. If reusing the trap, release the bar over the bag and remove the mouse.
- Double-bag the carcass and seal tightly.
- Dispose in an outdoor trash bin immediately, don’t leave it in the house.
- For electronic traps: Open the chamber over a bag and dump the mouse without touching it.
- Disinfect the trap with a bleach solution (1 part bleach to 10 parts water) or soap and hot water before resetting.
- Spray the area where the trap was placed with disinfectant. Mice urinate constantly, and the trap location may be contaminated.
For live traps:
- Transport the trap at least 1 mile from your home, preferably to a wooded area away from other structures.
- Wear gloves and release the mouse by opening the door and stepping back.
- Disinfect the trap thoroughly before reusing.
Assessing whether the problem is solved:
Catching one mouse doesn’t mean the infestation is over. Keep traps active for at least two weeks after the last catch. If traps remain empty and unsprung for 14 days, the immediate problem is likely resolved.
Check for new droppings during this period. Fresh droppings are dark and moist: old ones are gray and crumbly. If new evidence appears, the population wasn’t fully eliminated, or more mice are entering.
Prevention after trapping:
- Seal all entry points ¼ inch or larger with steel wool, caulk, or hardware cloth.
- Store food in glass or metal containers with tight lids.
- Eliminate clutter in basements, garages, and attics that provides nesting material.
- Trim tree branches and shrubs within 3 feet of the house, mice use them as bridges.
If trapping doesn’t reduce activity after three weeks, or if you’re catching more than 6-8 mice, consider calling a licensed pest control professional. Large infestations often have multiple entry points and may require exclusion work beyond typical DIY scope.